Introduction
When programming, NES graphics data is stored and compiled from CHR file types. In terms of viewing CHR data without possessing the uncompiled code, it can be accessed through a program’s ROM (.nes file type) by using a special type of program designed to display this data. These programs generally allow one to both view and edit the information that one finds, or to create wholly new information that can be compiled back into a .nes file. In other words, there are two movements that we are talking about: accessing and creating. Both are handy when drawing, since the former allows one to genuinely see what people did in the past, and of course the other allows for unique creations of your own.
There are several graphics editors available for the NES, though most were written some time ago and are no longer updated. Still, they are extremely capable and useful. MRN gives an introduction to using Tile Molester in Week 2 of his tutorials, and it will not be gone over again here. Eventually, this section will introduce what looks to be a very powerful editor currently in development, though it is still in the testing phase at the moment. In the meantime, a brief discussion of YY-CHR will given, as it will allow one to get started in the present.
YY-CHR
Find it, download it, install it; yay! Upon opening the program you can see some rather nice pictures, though outside of large cut-scenes they are of little use in actual game development. If you right click the top left corner, highlight the whole picture and then use ctrl X, you will be left with a blank canvas like what we have here:

As can be seen, the gridded area on the left consists of 256 squares. The area on the right serves as a zoomed-in display of whatever is found within the white square on the left. Drawing and editing are done on the right, with several standard options in terms of tools. They are no more and no less complicated than those found in Paint.
Another useful set of tools can be found along the top bar. These are the options to flip, rotate, or shift tiles on the canvas. They will affect anything that is highlighted. If using the left click, the default size of the box is a 4x4 tile area. However, if you right click, anything from a single tile all the way up to the entire canvas can be selected and altered (outlined by a blue box).
If we examine the editor, we can see that below the area on the right there are different color and palette options. Sixteen possible palette options can be configured, though one’s choices will not be saved for future use. Each palette choice consists of four colors, and the active palette also displays the hexadecimal values of each color. To change what colors are in the active palette, simply click on one of the four active colors and then click on your desired choice in the full NES spectrum below. As stated in the previous chapter, the colors will appear differently depending on both the display and format on which they are projected (CRT, LCD, emulator, actual hardware, etc.). Still, one blue can be seen to be darker or lighter than another blue. When drawing in YY-CHR, any of the blacks can be used, though when programming some should be avoided ($0D and another if I recall).
A quick way to gain some familiarity with the program is to open up a few NES or Game Boy files and see what is in them. It allows us to see how programmers organized their work and also the chance to start playing around with some of the tools. If you do not have anything handy, there is a .chr file included with
The Nerdy Nights. Please note that some files will not load correctly (
Zelda for instance), and most will display garbled information at first. After opening a file, scroll down until you find something besides static. Here is a sample screen from a popular Game Boy game:

Due to the currently selected colors, it can be difficult to tell what exactly one is looking at. Changing
only the colors gives us the following:

Now that we can see what we are looking at, we can also see that things are a bit out of sorts. Well, kind of anyways. Things as they are difficult to see visually, though they are arranged ideally from a (i.e. my) programming perspective. Thankfully, YY-CHR gives us the option of rearranging the tiles. Nine times out of ten, one of the options will be satisfactory. To do this, click on the Pattern option a bit below the display on the left. It will adjust in real time, as can be seen here:

It is now possible to see what the artist(s) envisioned for three characters and more. The pattern that is displayed is easy enough to decipher, and it gets easier to do with practice. Pay special attention to mirrored poses. Also, sprites are generally easier to see than background data. Different pattern layouts and dominant colors may also be used when switching tile types.
Just to note, if using CHR-RAM in one’s program, individual tiles can be swapped out as needed, and one is not limited to a static set 256 tiles. One could arrange all of a main character’s views and poses in one block of memory, as in the above example, and then load them into the program as needed. One of the benefits of the 256 tile grid, whether using CHR-RAM or CHR-ROM, is that it allows one to see everything that might be on a screen at once, decreasing the chance that one might conceptually plan for too much to be going on at a given time. In regards to sprites one needs to keep in mind player character and non-player character poses, weapons, items, status bar details, and a slew of other things. When dealing with background data, reserving space for an upper and lower case alphabet can eat up roughly a quarter of the available tiles. Add to this status bar elements or other stable features and the number grows to a good amount prior to drawing anything unique to a screen. Dealing with some of these concerns, however, is a topic for a different day.
As stated above, when jumping between background and sprite tiles, color choices may be off. This is also a common occurrence when combining assets from different games. In my own drawing practices I often search for different examples to analyze and deconstruct prior to attempting anything creative on my own part. Here we can see two sprites from two different games side-by-side:

The character on the right, while mostly accurate, needs a couple of colors swapped. YY-CHR allows us to do this relatively easily: highlight the desired group of tiles and then use control R to bring up the replace color option. The screen will look like this:

As a friendly warning let me just say that it can be a bit confusing to get the results that you want.
YY-CHR is a powerful tool, but it is one that really needs to be used in order to be understood. Play around with it, analyze what others have done, draw some things and post them here or elsewhere. Practice makes perfect as they say. Also, if you discover other useful features please share them. I only use what I need, hence why this discussion is a bit abbreviated.
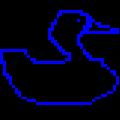
The main limitation of using a program like YY-CHR, at least in my own experience, is that it only allows us to see four colors at once. If we are layering sprites, adding faces, or simply want to see what two background tiles might look like next to each other, we are forced to use other programs. If programming, one option is simply to load the tiles into a mock or dummy game. In the past I have kept a stripped down program that only displays a single screen just for this purpose. Another option, particularly if actively drawing with more than three or four colors, is to use Paint or a comparable program. At the moment, this is what I use for the majority of my drawing. Simply zoom in all the way to the pixel level and get to work. I generally draw a 16x16 box in order to not go outside of a metatile. One should also be sure to not let any layered sprites exceed an 8x8 area (unless you want them to of course). Another benefit of using Paint is that it allows one to stack revisions next to each other. For any given character I can have tens or hundreds of revisions on the same canvas, and can trace the evolution of my work. When it comes time to actually load tiles back into YY-CHR, each pixel must be transferred over. I have heard that there is a way to copy and paste from Paint to the graphics editor, and I used to use it, but I’m not sure what happened. Plus, like the monks of old, there is a certain benefit to re-drawing one’s final work. I usually tell myself that before and after the process, but forget it during the transfer. On the plus side, some mistakes are usually caught in terms of consistency. Anyways, if anyone knows how to get the copy and paste to work, please speak up!
Now get drawing and let us see what you can do! Further chapters will deal with various smaller issues, and a great many of them are directly related to graphics. Until next time...